


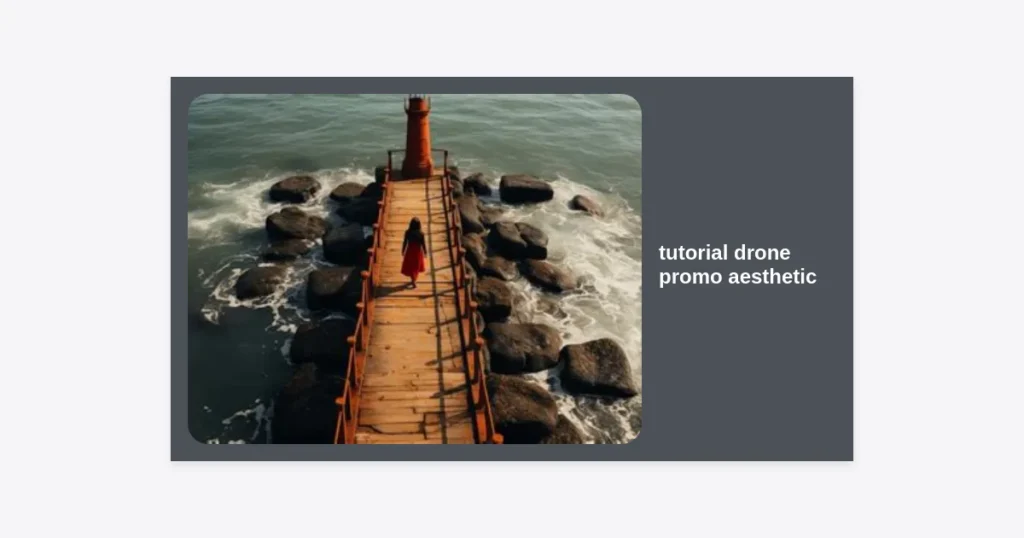
In the modern digital landscape, visual storytelling has evolved from simple handheld shots to breathtaking aerial perspectives that were once reserved for big-budget Hollywood productions. Today, anyone with a high-quality quadcopter and the right knowledge can produce stunning visuals. However, simply owning a drone isn’t enough; you need to understand the nuances of a tutorial drone promo aesthetic to truly stand out. This guide will take you from a basic pilot to a cinematic storyteller, focusing on the specific techniques that make drone promos look expensive, professional, and visually addictive.
Table of Contents
- Defining the Drone Promo Aesthetic
- Essential Gear for Professional Results
- Technical Camera Settings for Cinematography
- Mastering the Cinematic Flight Maneuvers
- The Role of Lighting and Composition
- Post-Production: Color Grading and Sound Design
- Storyboarding Your Promo for Maximum Impact
- Common Mistakes to Avoid in Aerial Promos
- Conclusion and Next Steps
Defining the Drone Promo Aesthetic
When we talk about a tutorial drone promo aesthetic, we are referring to a specific style of filmmaking that emphasizes smooth motion, vibrant but realistic colors, and a sense of scale that captivates the viewer immediately. It is not just about flying high; it’s about the deliberate choice of angles, the speed of movement, and how the footage interacts with light.
The aesthetic is characterized by a “clean” look. This means minimal noise in the shadows, perfectly stabilized movement, and a rhythmic flow that matches the background music. Whether you are promoting a real estate property, a luxury travel destination, or a lifestyle brand, the aesthetic needs to evoke an emotion—usually one of awe, freedom, or sophistication.
“Aesthetic isn’t just a filter; it’s the harmony between your technical execution and your creative vision.”
Essential Gear for Professional Results
To achieve a high-end tutorial drone promo aesthetic, your equipment choices matter significantly. While entry-level drones are great for practice, professional promos usually require specific features like larger sensors and adjustable apertures.
The Drone Choice
Drones with a 1-inch sensor or larger (like the DJI Air 3 or Mavic 3 series) are preferred because they handle dynamic range much better. Dynamic range allows you to capture details in both the bright sky and the dark shadows, which is essential for that polished look.
ND Filters (Neutral Density)
Perhaps the most overlooked tool in a drone pilot’s kit is the ND filter. Think of these as sunglasses for your drone. They reduce the amount of light hitting the sensor, allowing you to use a slower shutter speed. Without them, your footage may look “jittery” or too sharp, losing that cinematic motion blur that is a staple of the promo aesthetic.
- ND4/ND8: Good for low light or golden hour.
- ND16/ND32: Ideal for bright, sunny days.
- ND64: Necessary for extremely bright environments like snow or white sand beaches.
Technical Camera Settings for Cinematography
Automation is the enemy of the tutorial drone promo aesthetic. To get the best results, you must switch to manual mode. This ensures consistency across your shots, preventing the exposure from jumping around as the drone turns toward or away from the sun.
The 180-Degree Rule
For cinematic motion, your shutter speed should always be double your frame rate. If you are shooting at 24fps (the standard cinematic look), your shutter speed should be 1/50th of a second. If you are shooting at 60fps for slow motion, use a shutter speed of 1/120th. This creates a natural-looking motion blur that feels comfortable to the human eye.
Color Profiles: Log and Cinelike
Professional promos are rarely shot in the standard color profile. Shooting in D-Log or D-Cinelike captures a “flat” image with more data. While it looks grey and washed out on your screen, it provides the flexibility needed during the color grading stage to bring out deep colors and high contrast without losing detail.
Mastering the Cinematic Flight Maneuvers
The hallmark of a great tutorial drone promo aesthetic is the quality of the flight. Stick movements should be so smooth that they appear automated. Here are three essential maneuvers every pilot should master:
1. The Slow Reveal
Start with the camera pointing straight down at the ground or hidden behind an object (like a tree or a building). Slowly fly forward and tilt the gimbal up to reveal the horizon or the main subject. This creates a sense of discovery for the viewer.
2. The Orbit (Point of Interest)
Circling a subject while keeping it perfectly centered is a classic promo move. It provides a 360-degree view of the subject and creates a dynamic sense of depth as the background moves faster than the foreground. For the best aesthetic, keep the orbit slow and steady.
3. The Parallel Tracking Shot
This involve flying the drone alongside a moving subject, such as a car or a runner. By maintaining a constant distance and speed, you create a “stabilized” look that feels high-energy and professional.
The Role of Lighting and Composition
Even the best flying won’t save a video shot in harsh, midday light. Realizing the tutorial drone promo aesthetic requires an understanding of the “Golden Hour”—the hour after sunrise and the hour before sunset. During this time, the sun is low, creating long shadows and a warm, soft glow that makes everything look more cinematic.
In terms of composition, you should apply the same rules as traditional photography:
- Rule of Thirds: Place your subject on the intersecting lines of the grid rather than the dead center.
- Leading Lines: Use roads, rivers, or fences to lead the viewer’s eye toward the focal point.
- Framing: Fly through gaps in trees or under bridges to create a frame within the frame.
Post-Production: Color Grading and Sound Design
The magic often happens in the edit. Post-production is where you take raw footage and transform it into the tutorial drone promo aesthetic.
Color Grading Workflow
First, apply a “De-log” LUT (Look Up Table) to bring your flat footage back to a natural state. From there, adjust your white balance, contrast, and saturation. To reach that professional aesthetic, consider a slight “teal and orange” look, which creates a pleasing contrast between skin tones (or landscapes) and the sky.
The Importance of Sound
Drones don’t record usable audio, but a silent video feels empty. Adding high-quality sound effects (SFX) is vital. If you are flying over the ocean, add the sound of waves. If you are flying through a forest, add birds and rustling leaves. Layering these sounds with a compelling music track will make your promo feel immersive and high-end.
Storyboarding Your Promo for Maximum Impact
A series of random pretty shots does not make a promo. To achieve a powerful tutorial drone promo aesthetic, you need a narrative arc. Even a 30-second promo should have a beginning, middle, and end.
Step 1: The Hook. Start with your most visually arresting shot. You have roughly 2 seconds to capture the viewer’s attention before they scroll away.
Step 2: The Context. Show wider shots to establish the location and setting. This helps the viewer understand the “where” and “why” of the video.
Step 3: The Detail. Move in closer for intimate shots that highlight specific features or the “vibe” of the subject.
Step 4: The Call to Action. End with a logo or a clear shot of the product/location, leaving the viewer wanting more.
Common Mistakes to Avoid in Aerial Promos
Many beginners fail to reach the desired tutorial drone promo aesthetic because of a few common pitfalls:
- Over-flying: Moving too fast. Cinematic shots are usually slow and deliberate. If you need it faster, speed it up in post-production.
- Jerky movements: Sudden stops or starts in gimbal movement ruin the professional feel. Use “gimbal pitch dampening” settings in your drone app to smooth this out.
- Ignoring the weather: Windy days lead to micro-jitters that even the best gimbals can’t always fix. Always check the wind speeds before a shoot.
- Digital Zoom: Avoid using digital zoom as it significantly degrades image quality and introduces noise.
Conclusion and Next Steps
Mastering the tutorial drone promo aesthetic is a journey of continuous learning. It requires a balance of technical precision, creative vision, and disciplined post-production. By focusing on manual settings, flight smoothness, and the right lighting, you can elevate your content from simple hobbyist footage to professional-grade promo material.
Your next steps should be to practice the three key maneuvers mentioned above during the golden hour. Don’t be afraid to experiment with different ND filters and color grading styles until you find a look that defines your unique brand. The world looks different from above—it’s your job to show it in its best possible light.